While installing Windows 10 at the end of the installation Windows setup prompts you to create a user account. This is the main account on the system and is configured to be an administrator account by default. Although Windows gives the Administrator user status to this user account, and it has almost all administrative privileges. But did you know by default Windows 10 automatically generates another super or elevated Administrator account during the installation? Yes, the Build in administrator account is hidden by default due to security reasons that usually used to troubleshoot Windows problems. While it’s not required at all, it is often used for troubleshooting or administrative purposes If you Require this account Here we have Different ways to Enable The Hidden Administrator Account On Windows 10, 8.1 and 7.
Built-in admin vs local admin
The Built-in Windows 10 Administrator account is different from your current Administrator account. The main difference between the administrator account of the user and this built-in administrator account is that the former receives UAC prompts while the latter does not. The user account is an unelevated administrator account while the built-in administrator account for an elevated one. It gives you many more permissions to change things in the OS. It also gives you some extra privileges over the normal administrator account. The built-in Administrator account runs all programs and tools with admin rights by default. That means that all programs that are launched from this account are running without any restrictions.
Enable Windows 10 administrator account
Windows have different ways to enable this Hidden Administrator Account. You can enable the same through Local Users and Groups, Using the command prompt. Also, you can use the Local Security Policy ( Group Policy ) to Enable The Administrator Account as well.
Using Local Users And Groups
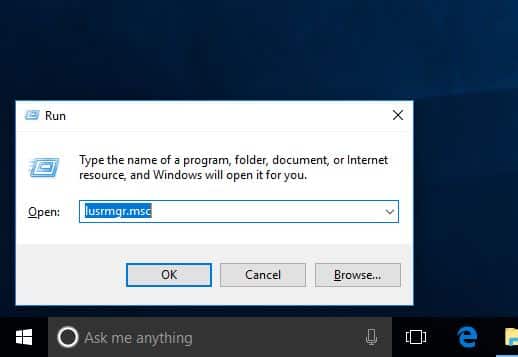
- Press Windows + R, type lusrmgr.msc click on Ok
- This will open Local Users and Groups windows,
- Here on the left-hand side click the Users folder,
- You see various account names in the middle pane
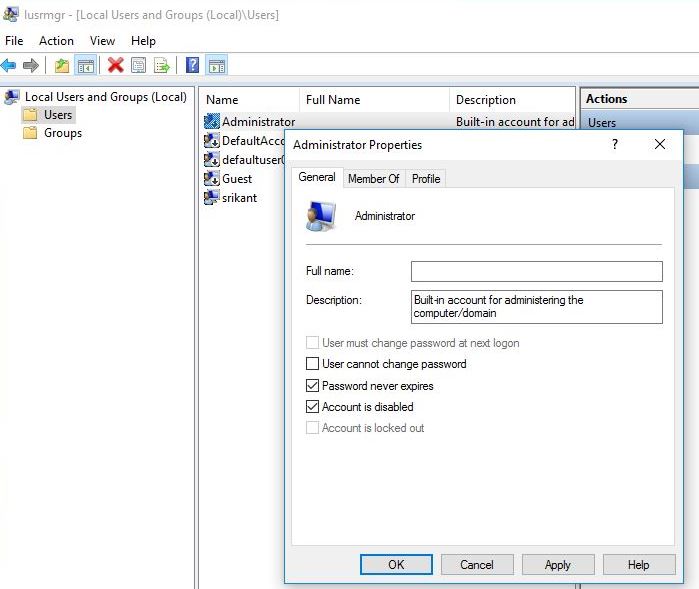
- And you will find the Administrator with an arrow mark. (That means The account is disabled)
- Now Right-click on Administrator and click properties
- Now under General Tab uncheck Account is disabled (refer to image Bellow)
- Now Click ok to make save changes and enable the administrator account.
- To set a password for this Administrator account
- Again right-click on administrator and select set password
- Type password for this Administrator account.
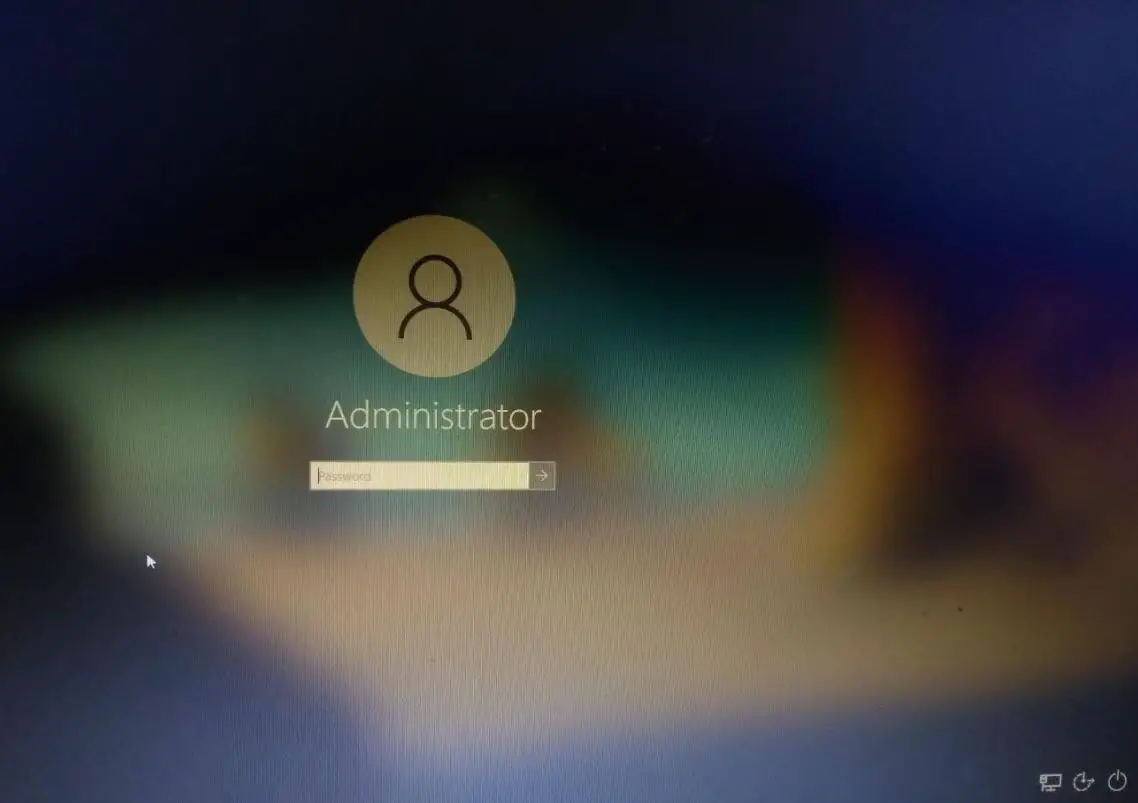
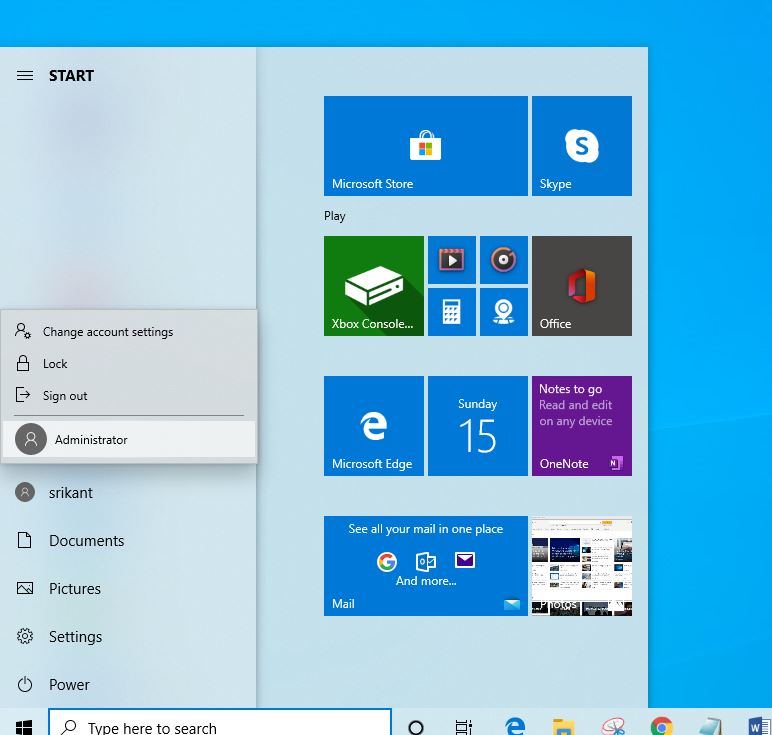
The newly enabled built-in Administrator account can now be accessed by clicking your user account name in the Start and then clicking the Administrator account. This hidden Administer will now also appear on the login screen of Windows 10.
Disable Windows 10 Administrator Account
If you have Enabled the Administrator Account only for Troubleshooting purposes or Run A program without any Restrictions. After Complete the task you can simply check the tick mark Account is disabled on the Administrator properties window.
Using Command prompt
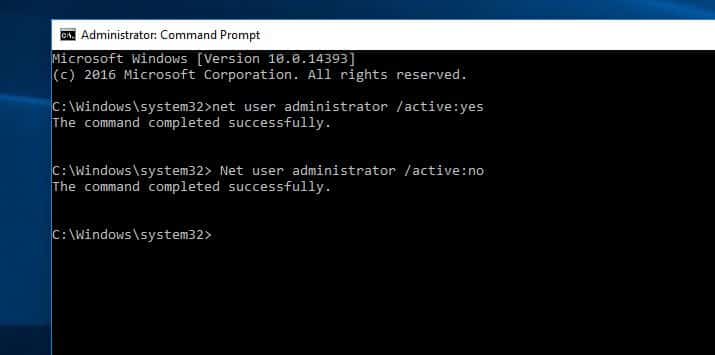
Enable Administrator Account using Command Prompt is a very simple and easy task. You can do this by only type a command line.
- Open the command prompt as administrator,
- Type command net user administrator /active: yes and press enter key,
- This will prompt the command to complete successfully.
The newly enabled built-in Administrator account can now be accessed by clicking your user account name in the Start and then clicking the Administrator account. This hidden Administer will now also appear on the login screen of Windows 10.
To disable the built-in Administrator account Type Net user administrator /active:no and hit Enter key.
Using Local Group Policy
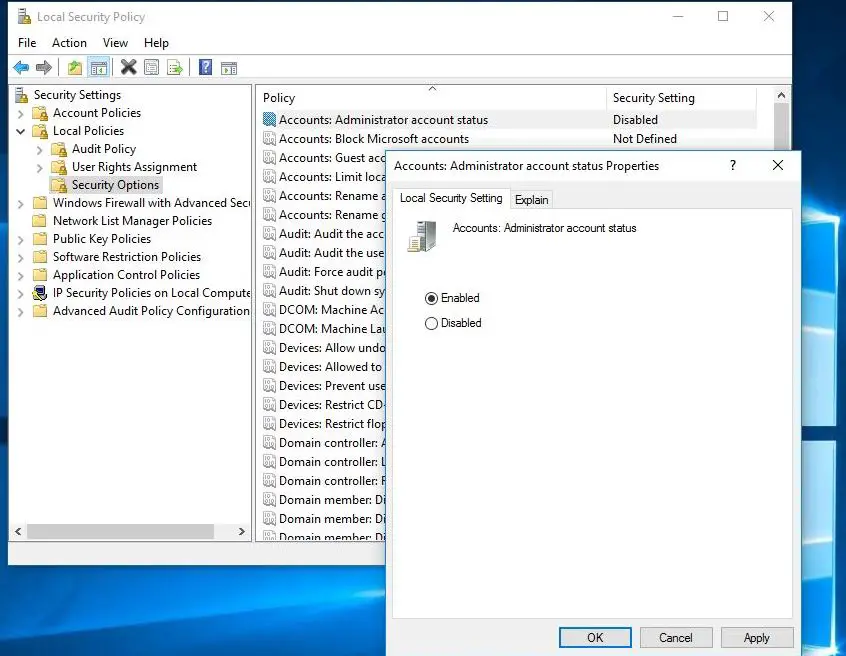
you can also use Local Security Policy (Group Policy) Editor to Enable the Hidden Administrator Account. Note Group policy Not Available on Windows Home And stater Editions.
Recommended: How To Enable Group policy For Home And Starter Users.
- Press Windows + R, type secpol.msc and click ok,
- This will open the Local Security Policy window,
- Now on the left pane expand Local Policies and click on Security Options.
- Here On the Middle pane Find and double-tap the policy called “Accounts: Administrator account status”.
- Right-click on it Select Enabled and click OK to enable it.
Click ok and apply To make save changes. That’s all Now you can log in with your Administrator Account.
To Disable The Administrator Account Follow The Same way. Open the Security policy Double click on Accounts: Administrator account status and select the Disable Radio button.
Also read:
- Different Ways To Enable Guest Account On Windows 10
- Windows 10 local account vs Microsoft account, which one is best for you?
- Windows 10 won’t shut down after the update? Here’s How To Fix It!
- Troubleshoot blue screen errors on Windows 10
- Solved: Windows 10 start menu search not working after update
